Tutorial - Adding to a Flutter App

Adding Hydro-SDK content to an existing Flutter app.

Prerequisites#

This tutorial assumes you have an existing Flutter app project and the npm and npx commands globaly available. https://docs.npmjs.com/cli/v7

Setup npm Dependencies#

Hydro-SDK is distributed both through npm and pub.dev. Run the following in the root of your Flutter app project to initialise your project's package.json and package-lock.json

npm init

Depend on Hydro-SDK#

Depend on a version of Hydro-SDK, for example 0.0.1-nightly.201. Add the following to your package.json and pubspec.yaml respectively.

"dependencies": {
"@hydro-sdk/hydro-sdk": "0.0.1-nightly.201"
}
hydro_sdk:
git:
ref: "0.0.1-nightly.201"
url: "git://github.com/hydro-sdk/hydro-sdk.git"

It's important that Hydro-SDK is included as a dependency and NOT a devDependency in both package.json and pubspec.yaml. Once Hydro-SDK is mature enough, it will be available as a separate pub package.

Run the following to download Hydro-SDK from npm and pub.dev.

npm install
flutter pub get

Adding TypeScript Code#

By convention, code intended to be run by Hydro-SDK is placed into a directory named ota in the root of your project. The following is a TypeScript version of the Flutter counter showcase. Place it into a file named ota/index.ts.

//Make sure to import from /index specifically if using barell imports.
//The compiler won't resolve /index by itself
import {
StatelessWidget,
Text,
Center,
StatefulWidget,
State,
Column,
MainAxisAlignment,
Icon
} from "@hydro-sdk/hydro-sdk/runtime/flutter/widgets/index";
import { AppBar, FloatingActionButton, Icons, MaterialApp, Scaffold, Theme } from "@hydro-sdk/hydro-sdk/runtime/flutter/material/index";
import { Widget } from "@hydro-sdk/hydro-sdk/runtime/flutter/widget";
import { BuildContext } from "@hydro-sdk/hydro-sdk/runtime/flutter/buildContext";
import { Key } from "@hydro-sdk/hydro-sdk/runtime/flutter/foundation/key";
import { runApp } from "@hydro-sdk/hydro-sdk/runtime/flutter/runApp";
export class CounterApp extends StatelessWidget {
public constructor() {
super();
}
public build(): Widget {
return new MaterialApp({
title: "Counter App",
initialRoute: "/",
home: new MyHomePage("Counter App Home Page"),
});
}
}
class MyHomePage extends StatefulWidget {
public title: string;
public constructor(title: string) {
super();
this.title = title;
}
public createState(): MyHomePageState {
return new MyHomePageState(this.title);
}
}
class MyHomePageState extends State<MyHomePage> {
private counter = 0;
public title: string;
public constructor(title: string) {
super();
this.title = title;
}
private incrementCounter = (): void => {
this.setState(() => {
this.counter++;
});
};
public dispose() {}
public initState() {}
public build(context: BuildContext): Widget {
return new Scaffold({
appBar: new AppBar({
title: new Text(this.title),
}),
body: new Center({
child: new Column({
mainAxisAlignment: MainAxisAlignment.center,
children: [
new Text("You have pushed the button this many times"),
new Text(this.counter.toString(), {
key: new Key("counter"),
style: Theme.of(context).textTheme.display1,
}),
],
}),
}),
floatingActionButton: new FloatingActionButton({
key: new Key("increment"),
child: new Icon(Icons.add),
onPressed: this.incrementCounter,
}),
});
}
}
runApp(() => new CounterApp());

Project Description#

Hydro builds and manages code in terms of projects. Each project consists of one component. Each component consists of one bytecode chunk. Bytecode chunks are the result of compiling source files starting from an entrypoint.

In the future it is likely that projects may have many components and that components may have many chunks.

Save the following to a file called hydro.json in the root of your Flutter project:

{
"project": "example-project",
"components": [
{
"name": "counter-example",
"chunks": [
{
"type": "mountable",
"baseUrl": "ota",
"entryPoint": "ota/index.ts"
}
]
}
]
}

The above describes how we will address our code (example-project/counter-example) as well as how to build it.

Including Hydro Content in Your Flutter App#

Hydro content can be placed anywhere a regular widget can (including in runApp in your main function). Include the following where you would like to run the counter example:

const RunComponent(
project: "example-project", component: "counter-example")

Running and Debugging#

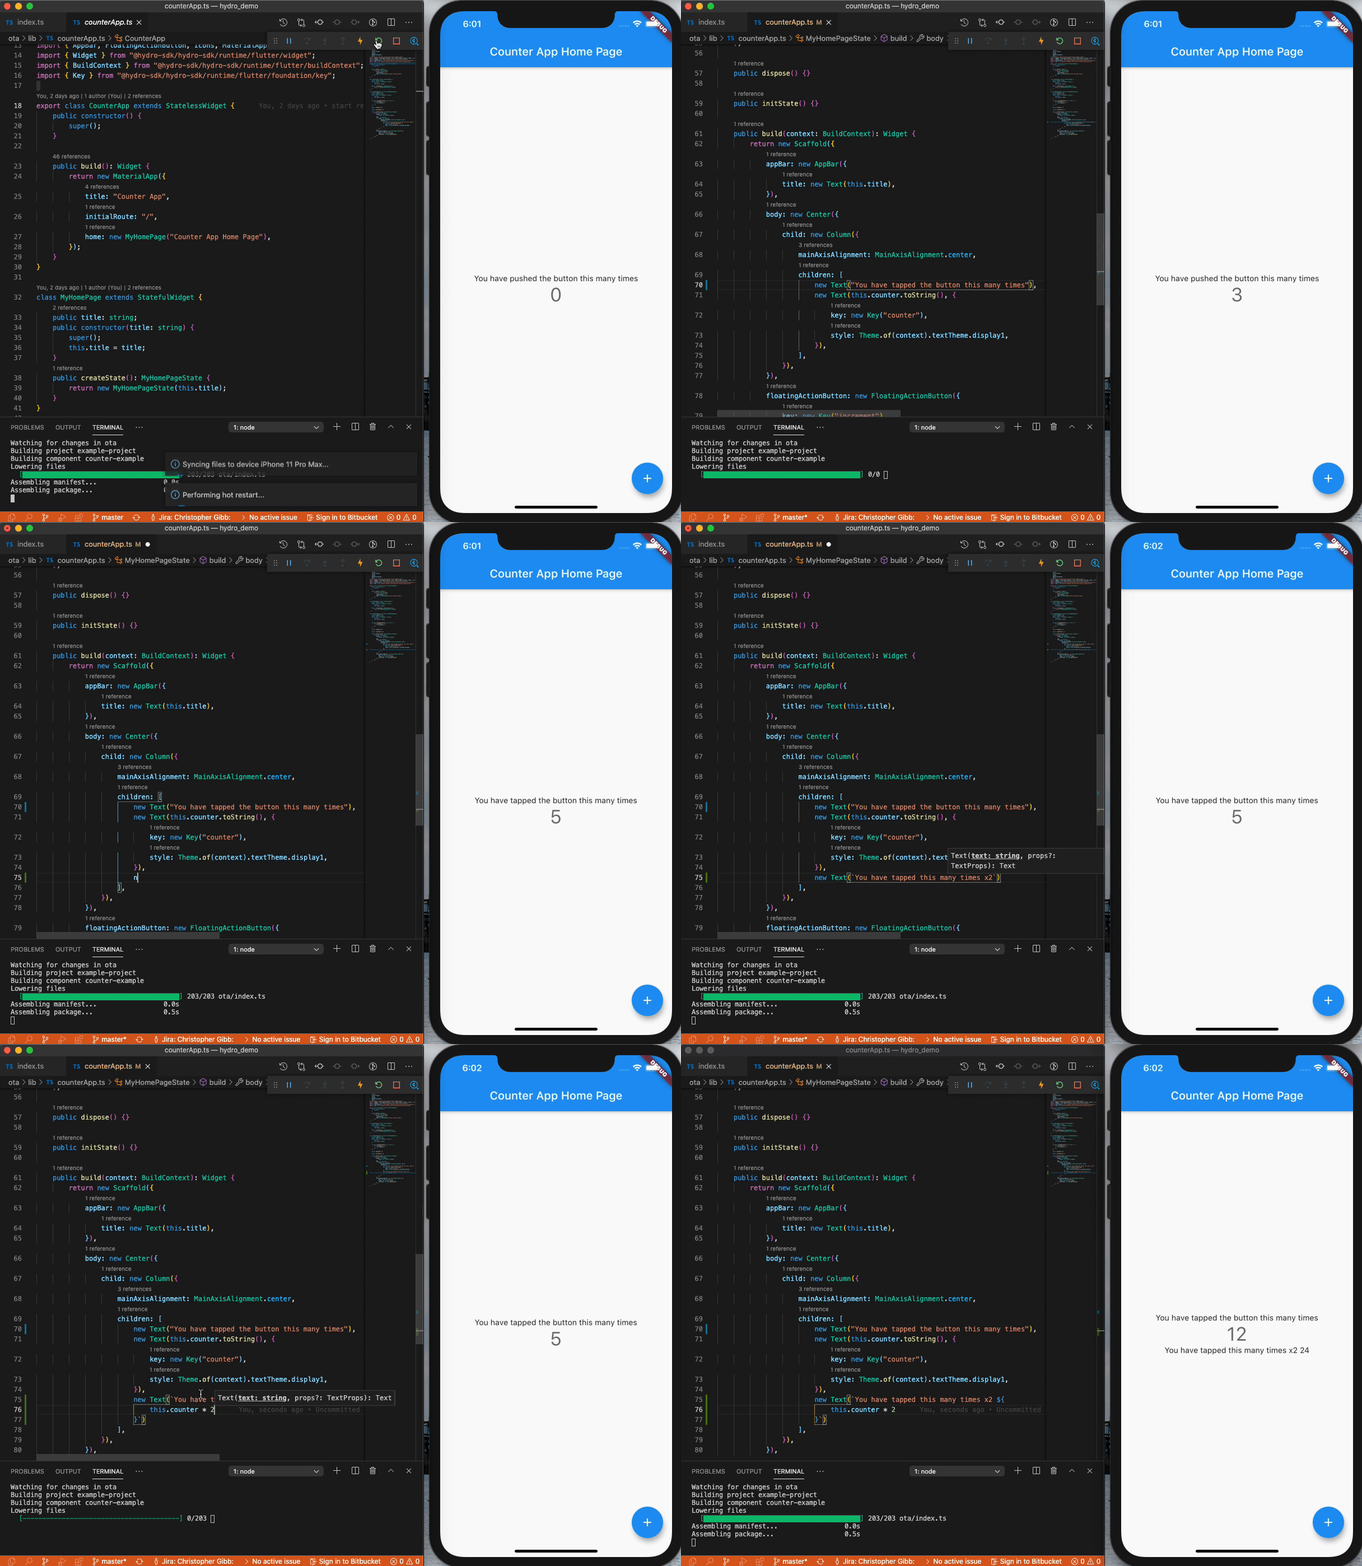
Start running lib/main.dart with the debugging tools in your favourite IDE or with flutter run. In a terminal, run npx hydroc run. The hydroc command is the interface to the Hydro-SDK SDK-Tools. If this is the first time running hydroc in this directory, it will first download the required SDK-Tools for the Hydro-SDK release you depend on in your package.json. While npx hydroc run is running, changes made to ota/index.ts will be reflected in your running app.

Note: Debugging on real-devices is currently not possible.
Action Gif